Showing posts with label craft tutorials. Show all posts

Monday, 25 July 2011

Crochet Coaster Pattern


I found this beautiful crochet pattern over at  Yvestown blog for crochet coasters and thought they look really pretty and easy to do so I thought I would give the pattern ago. 


After following the pattern, and making one coaster up to the instructions, I realised that the Yvestown pattern was in US crochet terminology and this was the result ......

although cute in itself, it wasn't what I was expecting,
it should have looked like this one .....


I realised that I needed to convert the pattern to UK crochet terminology so I did and changed the pattern a bit.

My UK Crochet Coaster Pattern as follows:

You will need:

DK Cotton, I used cotton yarn from both Rowan and Patons collection
 4mm hook (Size 8) or a 3.50mm hook depending on your tension
tapestry needle
scissors
steam iron
Stitches used:

Slip Stitch - SS
Double Crochet - DC
Treble - Trb
Chain - C

To Start:
Make 8 ch, close as a ring with a ss.
Row 1:
Make 2 ch, 23 dc in ring, close with a ss in the 2nd ch of the beginning of this row.
Row 2:
Make 4 ch, 1 trb in the closing ss of the previous row; 1 ch *skip 2 st; in the next st: 1 trb, 2 ch, 1 trb; 1 ch* Repeat 7x from *to*. Close row with a ss in the 2nd ch (of 4) of the start.
Row 3:
Make 2 ch; 1 trb, 2 ch, 2 trb under the 2 ch of the previous row; 1 sc under the 1 ch *2 trb, 2 ch, 2 trb as before; 1 sc as before*. Repeat 7 x from *to*. Close row with a ss in 2nd ch (of 2 ) of the start.
Row 4:
No build up with ch as before; then make 3 trb, 1 ch, 3 trb under the 2 ch of the previous row; 1 sc to the left and right of the sc of the previous row. Repeat 8x and close with a ss in the first st of the row.
 
to finish:

Bind off with a ss.

Sew in ends with a tapestry needle and press lightly with a steam iron. 

These are the ones I crocheted today:-


I think they are beautiful and will be crocheting some more no doubt.

Has anyone else had trouble with decoding UK and US crochet terminology in patterns?
How do you get around it?

Bee x

p.s. Many thanks to Yvestown for the original pattern idea

o x o x o x o x o x o x o x o x o

Monday, 11 July 2011

Crochet Bead Pattern

As promised in Friday's post, I have written up the instructions on
how to make a crochet bead as follows:-


CROCHET BEAD PATTERN

I used:-

4 ply cotton glace (Rowan) but you could use any yarn and alter the hook size accordingly;
Hook 3.00mm
Polyester Stuffing or off cuts of wool
Large tapestry needle with large eye and blunt end to sew in ends

Stitches used: (UK terminology)

Chain - (C)
Slip Stitch (SS)
Double Crochet (DC)

Techniques:

Working in rounds

PATTERN:

Round 1 -

Make a slip knot, then make 2C, miss the 1st C closest to hook, and then 6DC into 2nd C. SS to join to create a circle, 1C and turn.


Round 2

2DC into each of the DC's below (12DC in total), SS to join, 1C and turn.


Round 3

1DC into each of the 12DC below, SS to join, 1C and turn.


Round 4

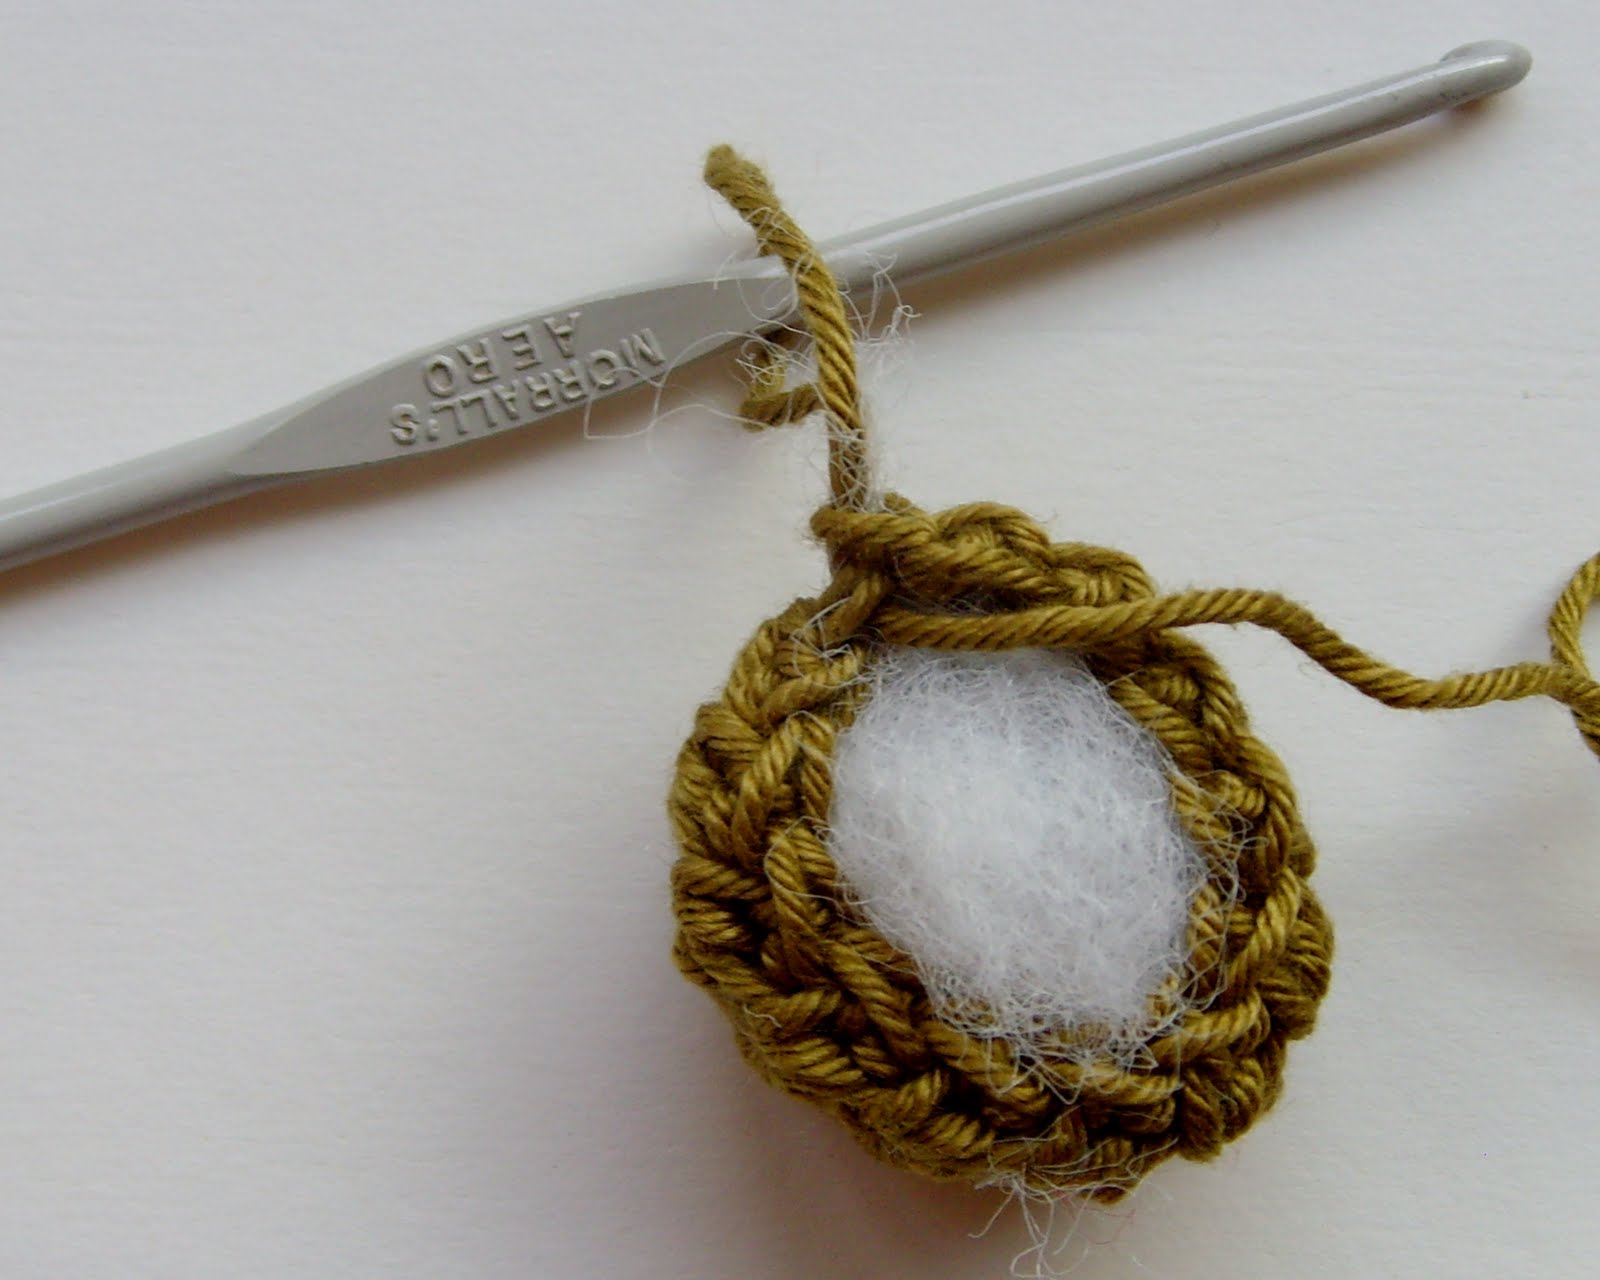
Repeat as for round 3, then fill crochet half with polyester stuffing, 1C and turn.


Round 5

Holding the stuffing in place if necessary, make 1DC into each of the 12DC below, SS to join, 1C and turn.


Round 6

* 1DC into the next 2DC, miss 1DC, repeat from *, then 1DC then SS to join, make 1C, no turn.


Round 7

* 1DC into DC below, miss DC*.  *Repeat 4 x. SS to join.  By now you will have a bead.


To finish

Cut the yarn leaving about 5cm, use your crochet hook to pull the yarn through the stitch to complete.
Sew in the ends and then roll the bead in your hands to mould it into shape.


There you have it!


I hope that I have written clear enough instructions.  However, if you get stuck, let me know and I'll try to help.

bee x

p.s you might have noticed that I am left hand crocheter so if you are right handed you can follow the pattern.  You can reverse the images with a mirror if you want.  There are also alot of crochet videos on You Tube for help.

o x o x o x o x o x o x o x o x o x o


Monday, 13 June 2011

Things to do on a rainy day ..........

What a wet Sunday we had .... the ground was grateful though!

I pottered about the flat yesterday, reading magazines and looking at some library books I had got out which I love doing as it feels like getting a treat without spending anything. I love books.  That's my new thing, I've been borrowing books from the library that are available and then buying the books I can't get.  It costs 50p to reserve a book and you can search the catalogue online.  I've been looking at Amazon first and then searching for the books on the library catalogue, its good fun and I'm doing my bit to save the library too.  It takes me back to when I was a wee girl when my mum used to take 'me and my brother' to the library on a wet afternoon for a break.

I flicked through some old magazines as I like to tear out appealing images and articles for reference purposes.  I had the idea to cut out fun images and use them to decorate some greetings cards and this is what I came up with ......... 


see tutorial for more information, although they are quite straight forward and easy to do. 


I also started crocheting some 'Mary Jane slippers'.  I had cold feet all day, despite having two pairs of socks on and a pair of slippers!!!  It must be bad circulation.  There are lots of patterns available on the Internet for these little pretties, some are free, some are available for a small charge.  I found free instructions on 'Good Knits' blog.  So far I have done half a slipper and have found that I will need to increase the number of rows in the body section to get the correct size.  I will keep you posted on the results and if my tootsies warm up as a result.

work in progress to warm tootsies

I hope you all had a good weekend.

bee x

o x o x o x o x o x o x o x o x o x o x o x

Tuesday, 30 March 2010

Spring Time Garland

I thought we would have a Spring theme this week as its is coming up to Easter.
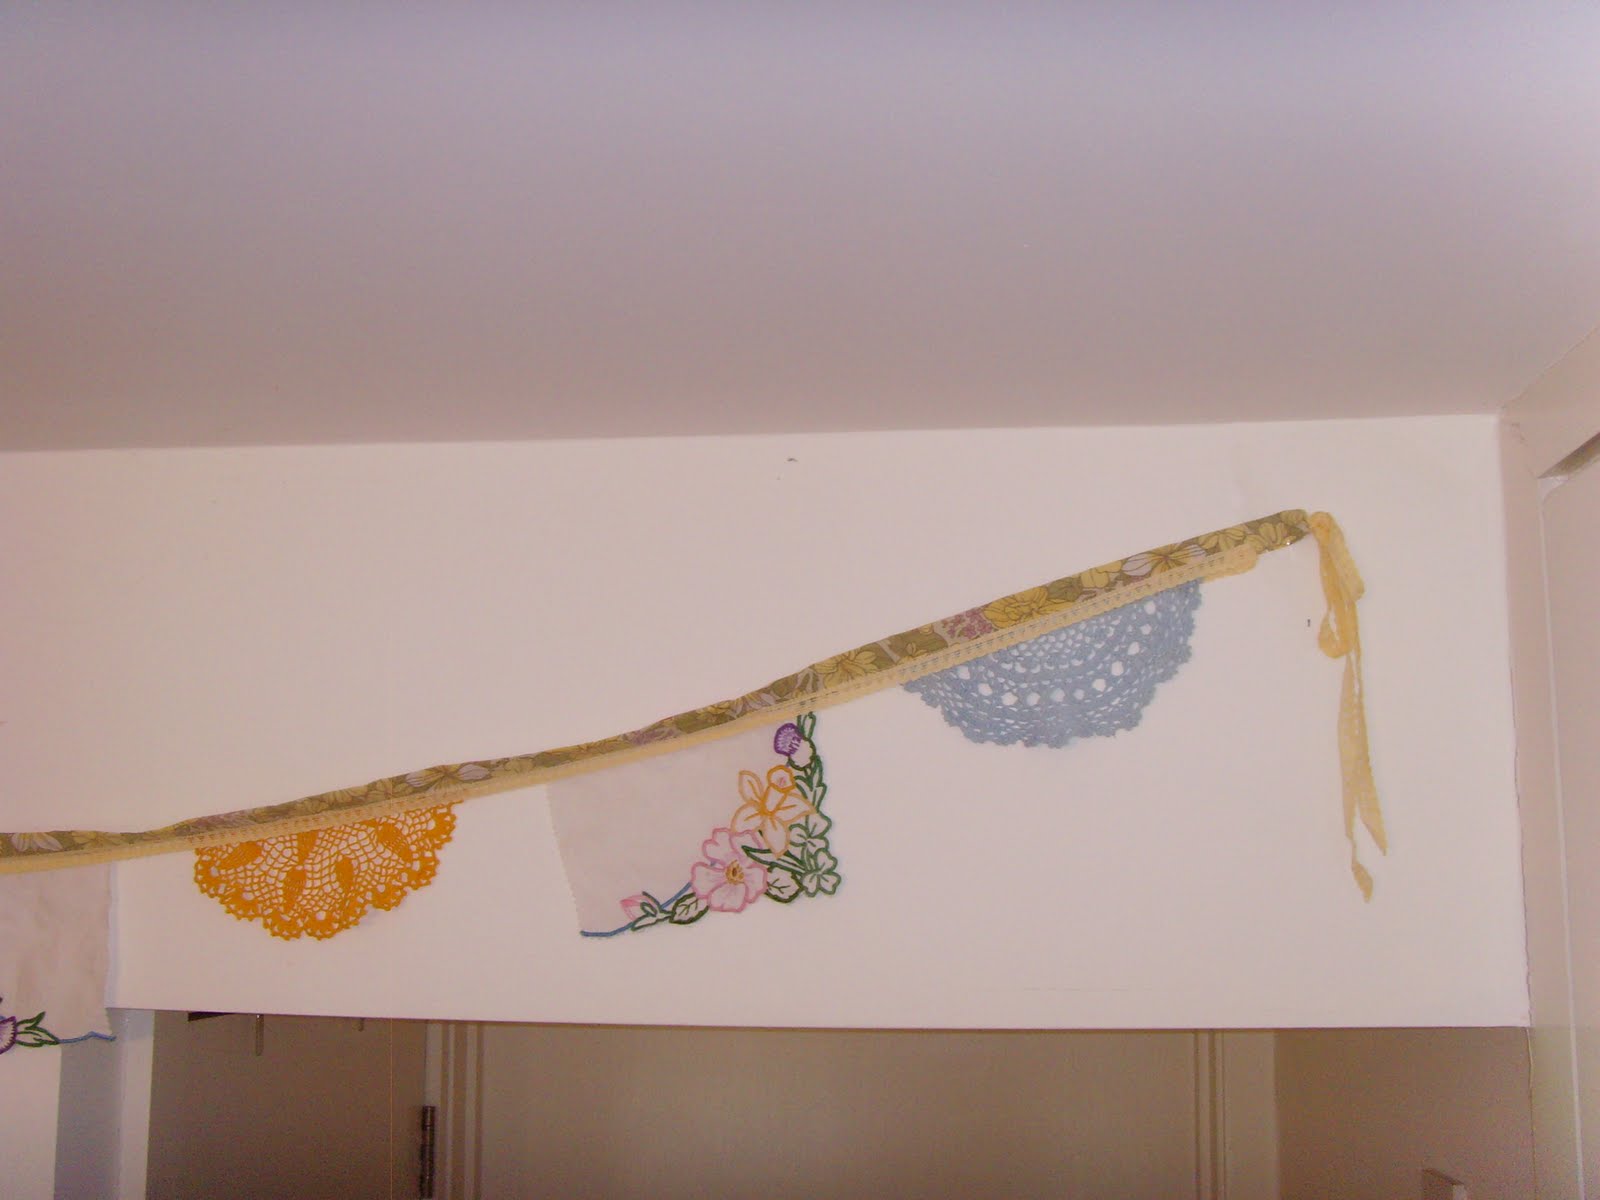
What with all the spring flowers about, the daffodils, the crocuses and the primroses.  I've even got a tulip poking its head out in the garden.  It inspired me to make this Spring Time Garland using vintage doilies, embroidered table mats, and lace. 


First of all, I washed and then hand dyed the doilies

powder blue dye

then halved the doilies and cut the table mat into four
and stitched them to a long strip of fabric, evenly spaced apart. I then stitched the lemon lace trim on both sides so it is reversible and edged the ends with a big lemon bow.

heres the result ..........


not the best pics
but it was raining so I had to find
 a suitable hanging place inside

I hope you like it,  It has inspired me to make some more to put in the
shop so I will keep you posted on these in due course

I hope you are all having a good week.

Bee x

o x o x o x o x o x o x o x o x o x o


Thursday, 11 February 2010

Pin Cushion and Storage Jar Make Over


Coffee Jar Make Over

Yesterday, I was a busy, busy, bee. 
Not only did I come up with the Valentines Heart Cards idea
but I recycled an old coffee jar into a beautiful storage jar for all my scissors, pens and pencils etc,
so that I can find them more easily,
and out of the lid, I made a pin cushion from scraps of trial knitting pieces.

I am often making items for other people as gifts so it was nice to make something for myself.


Here's what I used:

An old coffee jar and lid
a vintage crocheted doily
deep pink velvet ribbon
Pink embroidered ribbon
scissors
spray mount


I cut the doily in half and sprayed one side with spray mount and repeated
it with the other side

I then did the same with the pink embroidered ribbon and
placed it around the bottom of the jar to cover the cut edge of the doily


I tied the deep pink velvet ribbon around the top of the jar for decoration


Here it is!
A storage jar beauty!

o x o x o

For the pin cushion

I used:

A scouring pad
wadding
knitted scrap of fabric
felt or scrap of fabric for base
coffee jar lid
embroidery thread
vintage button
spray mount
large sewing needle
scissors

I cut up a scouring pad into 4 pieces
covered it with wadding
and then the knitted fabric and stitched it into a ball

I used pink embroidery thread and stitched this around the ball,
 in seven sections to create the flower shape
and then stitched on vintage baby pink button on top to cover the stitches

I covered the coffee jar lid with a strip of pink embroidered ribbon attached with spray mount
and then stuck the grey knitted ball into the lid

I cut a circle of pale felt and stuck it to the bottom of the lid
for a non slip surface


Here it is!
A beautiful grey and pink flower pin cushion

Bee x

o x o x o x o x o x o x o x o x o x o x o x o x o x o

Wednesday, 10 February 2010

Valentines Heart Card Tutorial


Valentine's Heart Cards Tutorial

Fold a piece of card in half
and draw half a heart shape to create a
cardboard template

Cut out template.
 Place on blank card and draw around it in pencil
Cut out using decopage scissors
or a craft knife (don't forget to use a cutting mat)

Use an eraser to remove the pencil line

On the inside of the blank card,
stick a piece of doily, fabric, lace or paper
over the heart shape to cover the hole

Voila! Valentines Heart Cards

Materials Used:

card stock
watercolour paper
white and gold paper doilies
vintage floral fabric
lace

Equipment Used:

Glue Stick or Spray Mount
Pencil
Eraser
Card Stock
decopage scissors or craft knife
paper cutter
cutting mat

I will be putting them in the shop soon in packs of 5 designs as I think they are
great for anniversaries, notelets, birthdays, not only valentines

Bee x

o x o x o x o x o x o x o x o x o x o x o x o

Related Posts Plugin for WordPress, Blogger...